RSS Feed

Category Archives: Arts and Crafts

Contemporary Arts Fair in Stratford upon Avon


Today (04/11/17) we just nipped into this free Contemporary Arts Fair at the town hall, in Stratford upon Avon. It is well worth a visit if you are in the area. With free admission (which is very rare with anything nowadays), there’s jewellery, paintings, ceramics, leather, wood work and more.

Upstairs there were more vendors, but also a wonderful pop up tea shop serving yummy cakes, tea and coffee. They had the most beautiful gold tea sets and the cakes we sampled (chocolate and some Stollen) were really fresh.

My highlight was Becky Paton and her gorgeous mosaics. As well as the larger pieces to break hearts and bank accounts, there were more purse friendly items such as Christmas decorations, brooches and clips. I bought this wonderful dragonfly!

The show is open today and Sunday, with more info available HERE.

Circus Themed Baby Bedroom


It didn’t actually start off with this theme! We had a seaside idea in mind, but I got over excited in Ikea after spotting the bed canopy and everything else seemed to fall in place! You may recognise the awesome metal suitcase shelves that we used to have in the bathroom of our previous house. They are perfect in Betsy’s room and are now adorned with vintage Ladybird books and toys! The bedding set is from Asda Living and came with a quilt, bumper and a couple of sheets. I adore the retro lion and tiger cushions, mini suitcases and melamine plates! They are from Dotcomgiftshop and tie everything in together! The elephant cushion was a recent buy from Sass & Belle. It is so funny and they do a zebra wearing a cowboy hat too!

After scouring the internet for a hot air balloon light, I decided to make my own. The ones I found were either too expensive or had teddy bears, bows and pearls everywhere. I am so pleased with how it turned out that I am now taking commissions! I even made little peg people of Richard, Betsy and I! If you would like one with your choice of theme (Imagine a steampunk version!), then message me for details.

So here it is, I hope you like it! Her room is very small, but I tried to fill it with lots of cheery things and sensory objects!

001-betsy-bedroom 002-betsy-bedroom 003-betsy-bedroom Hot Air Balloon Light 005-betsy-bedroom Circus Baby Bedroom Vintage Baby Bedroom

Corpse Bride Wedding Dress


I thought I would do this blog post quickly before packing up my computer! We are moving house and I should be hard at work, packing boxes and stuffing bags!

Although mostly known for my 1940’s singing and burlesque, one of my most popular blog posts is actually about a Corpse Bride Halloween Costume I made some years back, based on the Tim Burton film. The original wedding gown was donated to me by a good friend and I set to work re-working it and creating accessories.

A lovely bride-to-be by the name of Mira got in touch earlier this year after seeing my dress, asking whether I could do the same for her. So she sent me some images of a few wedding gowns to choose from and pounced on a sweetheart bust, lace overlay number which she sent to me to work on. Over the coming months it went through 4 hand dyes.  I added lace, vintage pearls, snipped the train, hand painted some detailing and hand stitched the slit, created a veil and headdress and even the bouquet and button hole to match!

I was not only eager to get it finish in time for her wedding, but was also rather pregnant so it was getting harder to pick up things if I dropped them on the floor! I was so proud of the dress and took pictures all the way through to show progress.

Miia’s wedding went beautifully and she sent me some pictures to show you all of her big day. Hopefully I will get to do more of these up-cycles and finger’s crossed some other themes like steampunk or Day of the Dead too!

Gothic Wedding Bouquet

I sprayed the bouquet with enamel paint, added jewels, covered wire and antique lace before adding hand painted accents.#


Corpse Bride Wedding Veil

Corpse Bride Wedding Veil. I made this out of natural muslin and sprayed and hand painted it.


Corpse Bride Wedding Gown

The gown and headdress. The headdress was handmade using covered wire and little flowers that were sprayed and painted.


Corpse Bride DressIMG_9426


tim burton corpse bride dress

Mira in the dress!


11798373_10206014507414644_98322618_n 11815743_10206014507494646_1558786243_n 11823965_10206014507574648_2043065175_n

Hook Rug Making


Although rag rugs had been around many years before (one was even found to contain pieces of uniform from the Battle of Waterloo!), there was a brief revival of rug making in WW2. It served as a useful pastime for men, women and children in war-torn Britain. There are many techniques for this wonderful hobby, but whether you poke it through or hook it up, the idea is to use up scraps of fabric, moth-eaten blankets and sheets to create floor coverings, seat pads and the like. Potato sacks (hessian can be bought from haberdashery and craft shops) were used as a base in which to pull or poke fabric strips through. Blunt pointed instruments like large knitting needles, drill bits or nails with wooden handles could be used for poking pieces of fabric through the burlap’s loose weave, creating colourful rugs to cheer up your wartime home.

Rag rug chair pad

Sun themed rag rug chair pad by Kitten von Mew


As fabric and clothing were rationed, ‘Make Do and Mend’ was high on the agenda of every household and not a scrap of either was ever waisted. If it was no longer fit for purpose, a new purpose was found to fit! Whether making slippers from hats or rugs from old coats, it was not only a necessity for the home, but also a necessity to keep one’s sanity! Crafts were the perfect way to keep hands busy, the mind focused and away from the horrors, even just for a little while.Rag rug making


After the war it became unfashionable to make these rugs as they were associated with poverty and hard times, but luckily this wonderful craft was revived and is still going strong. Why not make a small rag surface protector for putting serving dishes on and test your own creative skills?


Hook rug chair pad

Side view showing the different types of fabrics used and the textures they create.


I went to a quilting fair late last year (I know, how can my life get any more exciting?) and met a lady who did rag rugging and hooking. I bought a rug hook from her and decided to give it a go…but didn’t quite get round to it. Low and behold at Christmas, what should Mama and Papa surprise me with, but a parcel of hessian fabric (I bet the excitement is killing you right now). Did I throw it down in disgust and ask where my pony was? Did I cry and demand an iPad? No, I flipping well went home and started cutting up fabric.

I decided to start small and drew out a simple sunrise design on the hessian and cut up long pieces of scrap fabric in blues, reds and oranges. I can tell you now that smooth cottons and polycottons are perfect. Loose weave tapestry types will make you want to bite someone’s face (Mr Mew got off lightly, you can’t see the scars). I thought it best to do a hooked rug as I wanted the detail to be quite apparent and also liked the thought of working with longer pieces of material as opposed to short strips used in ragging. You can work on your lap or stretch it over a wooden frame (recommended) and if asthmatic like me, wear a dust mask…taking it off to pose for photos obviously…

It took me about 5 weeks to do my rocking chair seat cover and I have finished it off by putting a layer of PVA glue on the back to prevent pulling and then a cotton backing. It looks wonderful on the rocking chair!

I am now on a much larger project…a rug made out of a kid’s sack race sack. I will certainly post pictures once finished!

Yarn Bombing – The Remembering Tree, Stratford upon Avon


yarn bombing

Yarn bombing by GAGA UK, Wearing Trousers and Coat by Heyday Online

There have been many yarn bombing incidents around the world, but none have touched me as much as the one in my home town. In pitch darkness on the 1st December 2013, 10 volunteers constructed this crocheted tree snood around a big old chestnut in the Bankcroft Gardens, Stratford upon Avon. Made from 1500 crocheted squares, it is called The Remembering Tree and each square can be ‘bought’ and dedicated to a loved one who has passed away. I bought one in memory of my Grandad with the Pipe. It helps us celebrate life and loved ones in all its wonderful colours and was made by women in South Africa from poor communities.

crochet bomb tree

Crochet Bombed Tree


This project has helped them earn an income and has taught them new skills. It looks like this tree will be the biggest one yarn bombed in Europe!

crocheted tree

1500 crocheted squares make up the Remembering Tree

After the New Year, the team will take the yarn squares down. The synthetic wool will be washed and recycled into blankets, which will be sent to Sierra Leone or a local homeless charity. For more information visit GAGA UK.

gaga uk remembering tree

All photos owned by Kitten von Mew 2013

Stumbling upon such a wonderful and poignant statement will certainly be something I will remember for the rest of my life. Who can say that about a crocheted square?

the remembering tree

The Remembering Tree, Stratford upon Avon

Christmas Craft Fair – Warwickshire Exhibition Centre


A huge thank you for the wonderful comments and greetings received at the craft fair on Sunday. I had a wonderful time and cannot wait to be back next year!

santa-claus-pin-up

Kitten von Mew and Santa Claus!

alpaca

Alpaca…you paca…we all paca!

vintage-pinup-snake

Ssssssssanta Baby! First time holding a snake!


Vintage Knitting for Knit Wits


1940s pixie hat

1940’s Pixie Hat by Kitten von Mew

So I have started to knit. I tried doing this as a child and did ok on a standard knit and changing colours for stripes, but got bored as every one does and went back to playing pirates. Pirates don’t knit.

So now I have started again and with baby steps have become confident at basic knitting and purling, knitting together and casting on an off. I can see those talented people finishing off their Fairisle masterpieces with 5 needles, rolling their eyes at me as they cast off their sweater using their toes and start crocheting a matching beret just using their eyelashes… but this is a huge challenge for me. Anything that needs a precise pattern is a complete nightmare for this Kitten. I enjoy my crafts and yes have made some dresses, but alot of that is following a basic pattern and then botch jobbing it to suit me.  You cannot do this with knitting! If you drop a stitch it screams as you with its big gaping mouth, whilst its brothers and sister mock me until I have to pull them all off and start over. I have also tried cable knit and have resorted to the fact that I am ‘Knitslexic’ with some things. I know how it should look and find it perfectly logical to follow the pattern…until my blasted hands get in the way and my brain starts singing ‘I Wish I Was in Dixie.’ I suddenly look down to find that my twisted rope pattern resembles mores of a half eaten bread pudding.

I did however manage to make a 1940’s adult sized pixie hat! Although the pattern was for beginners, I found it a little complicated to follow, so have created a basic pattern that any beginner can follow and knit themselves a wonderful little hat for the chilly seasons and windy WWII event fields! It will go great with your Heyday Coat or Gab Jacket and why not knit a matching pouch bag using the same basic pattern?

40s knitted hat

1940’s knitted pixie Hat

What you will need:

  • 7 1/2 Needles
  • Thick to Chunky Wool
  • Large needle

Cast on 44 stitches and knit 4 purl 4 to the end of the line. Do this for the next 9 lines to create a rib effect

After this, garter stitch (that is just regular knitting to me and other beginners) until the whole thing is about 8″ long. You can obviously do this longer if your head is larger. I measured from behind my front curls (I like some of my hair to halo my face and soften the lines, but you can always knit one that comes right to the front of the head if you wish) to where I wanted the point at the back.

Cast off and fold it in half. The ribbing pattern will be the front of your hat.

Take your needle and spend the rest of the weekend cursing as you try and thread your wool into it’s eye. Once you have succeeded, grab a cup of tea as a reward and blanket stitch the back of your hat together, making sure it is inside-out as you do so.

Next you need to make the chin strap. If you have more patience, you can do 2 long knitted ribbons to tie in a bow. I had no patience left, hence I did a short strap and button. Simply cast on 6 stitches and knit 2, purl 2, knit 2 for every line until it is 7 inches long.

Change to standard garter stitch for the last inch. I just dropped a stitch to make the button hole on the second row of garter stitches. Im sure advanced knitters would have a heart attack at this, but it works for me. Cast off when your work measures 8 inches or more for larger heads.

After you have finished the strap, turn your hat the right way and sew it onto one of the pointed corners at the front of your hat. Sew a button one the opposite side for the strap to attach to.

Turn the hat around and tug the back point a little so it is more accentuated.

You can either leave it plain or adorn it with little pom poms as I have done! 3 on each side grouped together at the ears and 2 dangling from the point.

If you want to make a matching pouch bag simply copy the instructions for the basis of the hat, but sew up each side, leaving the ribbed top open. Thread your needle with wool and then sew in and out all around the ribbing to create a drawstring top. Adorn with pom poms and lie down in front of reruns of The House of Elliot, exhausted and surprised at your own talents.

The Craft Fair


kitten von mew crafts stall

We had such a wonderful time at Warwickshire Exhibition Centre last Sunday! It was the first time I had been and I was very impressed with the space and creative table displays. It was hard not to get tempted by some of the goodies on the stalls as I was there to make money not spend it, but still treated myself to a lovely hand knitted top which was a ridiculously good deal.

Along with my pincushion cups and hair clips, Mr Mew had brought along a few of his handmade wooden toys and a couple of light boxes. We had also made some cute bird feeders which proved to be rather popular!

Mr Mew and his wooden Bi-Plane

As well as selling our beloved crafts, I also sang some Christmas tunes and vintage songs to get everyone in the mood. I nearly laughed out loud when the most adorable little tot you have ever seen started jigging around like a dashboard hula girl to Santa Claus is Coming to Town! It was quite chilly, but adrenaline kept me reasonably warm for the most part and only my toes seemed to suffer the feeling of loss of life. I wore a wonderful new dress that I am utterly thrilled with, but cannot reveal where I got it as of yet!

Kitten von Mew singing at the Craft Fair

Kitten von Mew singing at the Craft Fair, wearing a pincushion corsage from her stall

In the end I sold 2 pincushion cups (My favourite one (the rabbit in lettuce leaves) and a bird in a nest of pins, a pincushion shoe, 3 pincushion corsages and 3 bird feeders so not bad at all! Next up is a vintage and crafts fair at Hatton Park Hall THIS Sunday (9th Dec) where I will be singing and selling some of my vintage clothing collection! The fun never ends!

Make Do from a Table for Two


This weekend I decided to make a dress out of my WWII house dress pattern. I wouldn’t usually endeavour to do such a painful sewing task, but this fabulously easy pattern requires no buttons or zips (courtesy of wartime rationing) and is made out of 1 front panel, 1 back panel, a sash belt and optional pockets.

WWII Dress Pattern and table cloth

WWII dress pattern and embroidered table cloth

I have used this pattern a couple of times before; making a dress and a top, but I felt more confident on this project. I had bought a beautiful hand embroidered table cloth at a charity shop in Weymouth with the soul intention of creating a dress or top with it. I have a couple of embroidered tablecloths that I adore, but never get to use them for fear of spillage and staining, so like many people, I store them away and they are never admired. Unfortunately I only had enough of the flower embellished Irish linen to do the front of the dress and belt, so took one of the matching serviettes to the local haberdashery shop to match it with plain linen or calico. I did find some great natural calico that matched brilliantly…until I had finished stitching and realised that the tablecloth was in fact a lighter shade than the flipping serviettes! That aside, I am very happy with this pretty summer dress. The back is very plain, with just the floral detailing of the sash belt offering a rainbow speckling of colour, whilst the front is splendid with colour and pattern. I chose not to put the pockets on as they would have covered up some of the beautiful handiwork, but added some green upholstery trim to the neckline to finish it off.

WWII House Dress

Finished dress by Kitten von Mew

It reminds me of either the make do and mend flour sack dresses or perhaps the western European fashions of the time. I cannot wait to wear it next summer, but just hope that if I decide to lay down in the sunshine I am not mistaken for a picnic blanket…

The Corpse Bride Halloween Costume


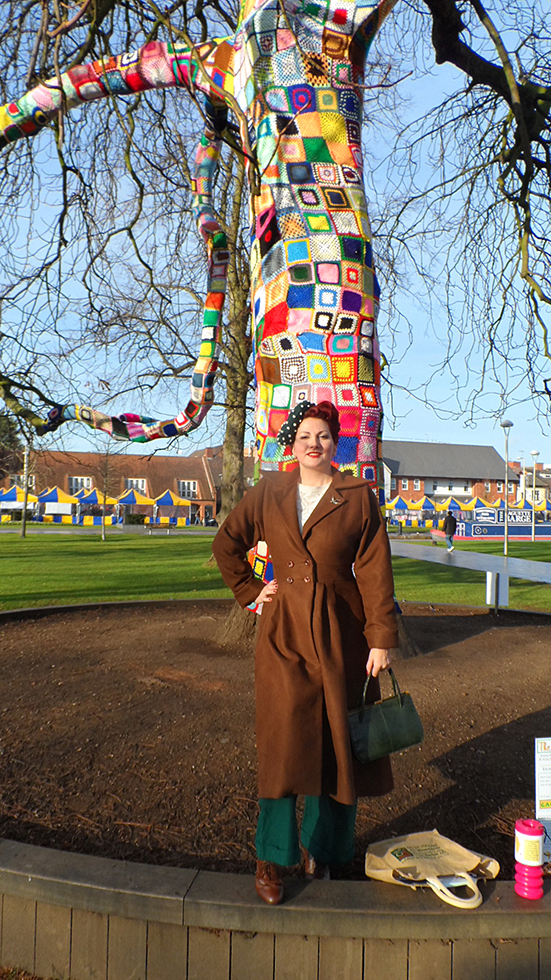
It’s a well known fact that I LOVE Halloween. Ever since I was a child, I have never been one for plain old costumes and created ever more unique ensembles, ranging from Dracula with a puppet snake (made out of a pair of tights and worn like a sock puppet), road kill and Charlotte (a famous girl ghost of Warwickshire who was locked in the family tomb in the plague as they thought she was dead, only to re-open the tomb later to find her dead on the steps with her fingernails worn away from clawing at the entrance and chunks of her arm missing…presumably from hunger and madness).

Last year I experimented with a 1920’s harlequin and sugar skull makeup and this year I have been given the opportunity to try and recreate Tim Burton’s fabulous Corpse Bride! I have longed to do this ever since watching the film, but finding the time and excuse has been difficult. With an aptly themed Birmingham Dr Sketchys on the way and a small Halloween get together, I think I may have found the excuse!

Candee, Birmingham Dr Sketchys curator and my dear friend, donated a wedding dress for me to play around with. After trying it on to test the style, I carefully cut out the underskirts and set about cutting off the sleeves and bodice, so that I could re-attach with a more A-line look. The silk gave the gown a fabulous vintage feel from the offset, whilst the Venice lace around the edge helped give a ragged feel to the train. I dyed the bodice and skirt separately in a tin bath with China Blue Dylon dye, taking the bodice out after a few minutes as I wanted this paler. I started getting concerned that it was turning green but luckily it did eventually go pale blue! The Corpse Bride’s dress was actually white, but I loved how the dress took on a blue hue in the moonlight and shadows as it gave it more atmosphere. I played the movie again and again to get a feel of the train with its holes and jagged edges and to get the other small details right, such as the purple-blue edging. I managed this with some BMW Topaz Blue spray paint and hand painted over the top with blue and purple acrylics all the way around the train and bodice edges. I also added spray paint around the holes and tears to make them really stand out.

handmade-corpse-bride-costume-back

Back of the gown with new panels to increase bust. Created by Kitten von Mew

Next came that hole, revealing the Bride’s ribs. After searching online for costumes and SFX latex body parts I decided to make my own simple version. I didn’t want gory or bloody and bits of flesh hanging off the bones. The beauty of Tim Burton is the clean lines and purity. Death was portrayed as the colourful happy place compared to ‘upstairs’ (Life), which was tinted with sepia and dull greys. I used high quality black velvet for the background as this fabric is perfect for absorbing the light, giving the illusion of a dark cavity. For the ribs I found some off-white ribbon sewed 2 lengths together to make a tube and stuffed it with polyester stuffing. I made 4 of these and then sewed them onto the black velvet with a slight curve to make the effect of ribs. This was then glued to the inside of the bodice and left to dry whilst I danced around the room with excitement.

handmade-corpse-bride-costume-front

Corpse Bride Costume by Kitten von Mew

tim-burtons-corpse-bride-handmade-costume-ribs

Bodice detail showing ribs. Costume by Kitten von Mew

This weekend I managed to complete the headdress and veil! The veil in the animation is made from Muslin, which has a good tatty feel to it. I happened to have some spare and kept it off white, whilst cutting jagged edges and spraying them with the car paint. In some parts of the movie, you can see swirly vine detailing on the veil. It is sometimes portrayed in grey and others in purple, so I took the theatrical route and went the latter so it stood out.

handmade-corpse-bride-veil

Corpse Bride Veil by Kitten von Mew

the-corpse-bride-headdress

Handmade Headdress by Kitten von Mew

Next came the headdress. I had bought a long wig from Ebay which ended up being purple and not dark blue! It doesn’t look too bad, so sprayed a little paint on it to add some matting. The headdress itself I made out of thin plastic corset boning wrapped with leaves, berries and flowers. There are more on one side than the other, which is true of the film too when you see the piano duet scene. I sprayed with the same blue paint and over-painted with grey acrylics. The veil was then attached to the back by folding over the top edge.

Next the legs…The Corpse Bride has one skeleton leg with skin on her foot and ankle like a baggy blue sock, whilst her other leg is blue skin. This is easily done by cutting off 1 blue leg from your tights and attaching a skeleton print one in its place. You can then use the cut off blue leg to use as the baggy skin. Genius huh?

The arm has been a little more difficult. I haven’t got the pennies to buy a prop skeleton arm (my first idea), so will be doctoring a skeleton print glove by adding more length and extra bone. This will then be sewn to the underarm of the bodice and held on the shoulder with some toupee tape if needed.

I have the makeup ordered (light green for the base, then blue and white to blend with purple eye powder for shadows) and will post about this when I have tried it out!

Enjoy the photos of my costume and I will get some shots IN the costume on Halloween!